
This document will walk you through basic setup and usage of the City’s instant messaging, chat, meeting, and collaboration tool, Microsoft Teams. This document is not meant to be an all-encompassing document of all available features, as Teams offers a rich set of tools, but will go over accessing Teams online, installing on a computer if not already installed, and basic operations such as creating your first team and adding members.
There is a wealth of information, quick reference guides, and in-depth training videos available at: https://docs.microsoft.com/en-US/microsoftteams/enduser-training?WT.mc_id=TeamsAdminCenterCSH
There is a Teams app for both iPhone and Android that offers much of the same functionality as the desktop version so remote users can access files, chat, and collaborate from anywhere with other members of their team.
In short, Microsoft Teams allows users to connect, chat, meet, and collaborate in real-time on files and projects. Teams can be setup for entire departments, then “channels” within that departmental team can be created to group like workers, projects, etc. with access to a shared calendar and files. A team can be as basic, or granular, as needed.
For instance:
The Finance director sets up a team and adds the deputy directors as team “owners”.
The deputies, as owners, can create channels for departmental purposes – Budget, Payroll, Pension, etc.
The deputy directors can then add their direct reports as team members. Files can be uploaded to the individual channels or to the entire team. Team members can IM, chat, meet, or collaborate within that channel without involving members of another group. Deputies can do the same with their direct reports, and the director can do the same with the deputies, or even all members of the team.
Let’s get started! First, check to see if Microsoft Teams is already installed on your computer. If so, all you need to do is open it and log in with your Office365 credentials, which are always username@birminghamal.gov and your Windows password.
If not installed, there are several ways to access Teams and install it.
- If you’ve been added to a team by another user, you’ll receive an email saying so with a link to install Teams of you haven’t already.
- You can install the latest version of the City’s Office365 suite from https://portal.office.com .
- You can access Teams Online at https://portal.office.com. The online version also has an install link.
- *** See the document – Accessing and Installing Office365 for City of Birmingham Users for instructions on accessing the city’s Office365 portal and installing your applications. ***
- Install the free Microsoft Teams app on your iPhone or Android smartphone.
Accessing and installing from the portal site:
Log into https://portal.office.com with your city credentials - username: yourusername@birminghamal.gov and your normal Window’s password.
Once logged in, you’ll see the main portal screen. Click on Teams.
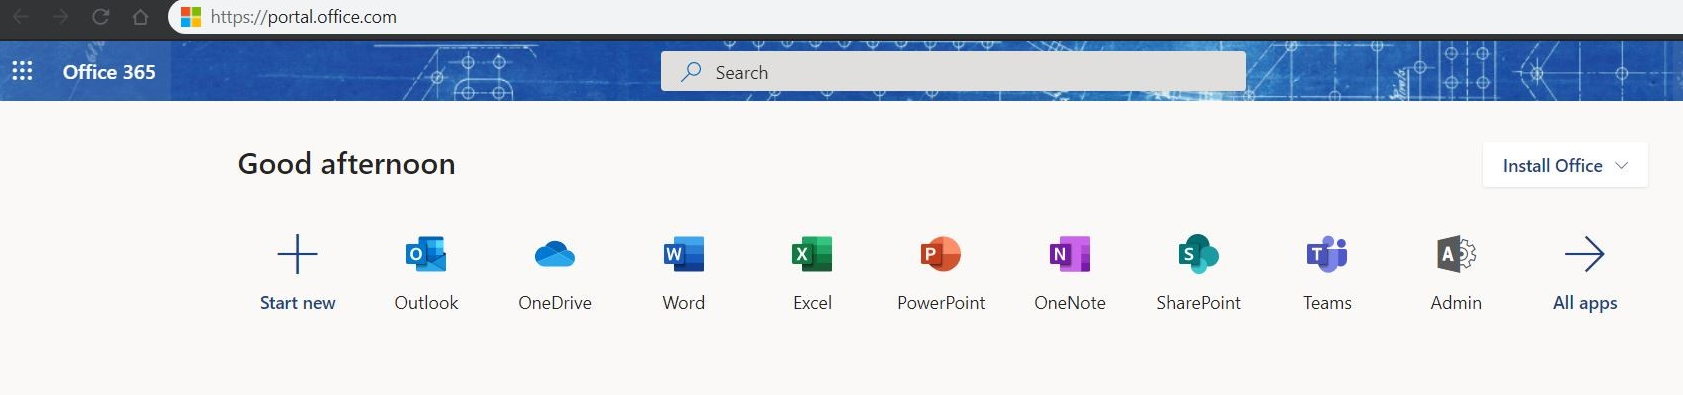
The online version has all the same features as the desktop app. This document references the installed version, but everything can be done from the online version. If you wish to install the app, the install link is at the very bottom, on the left.
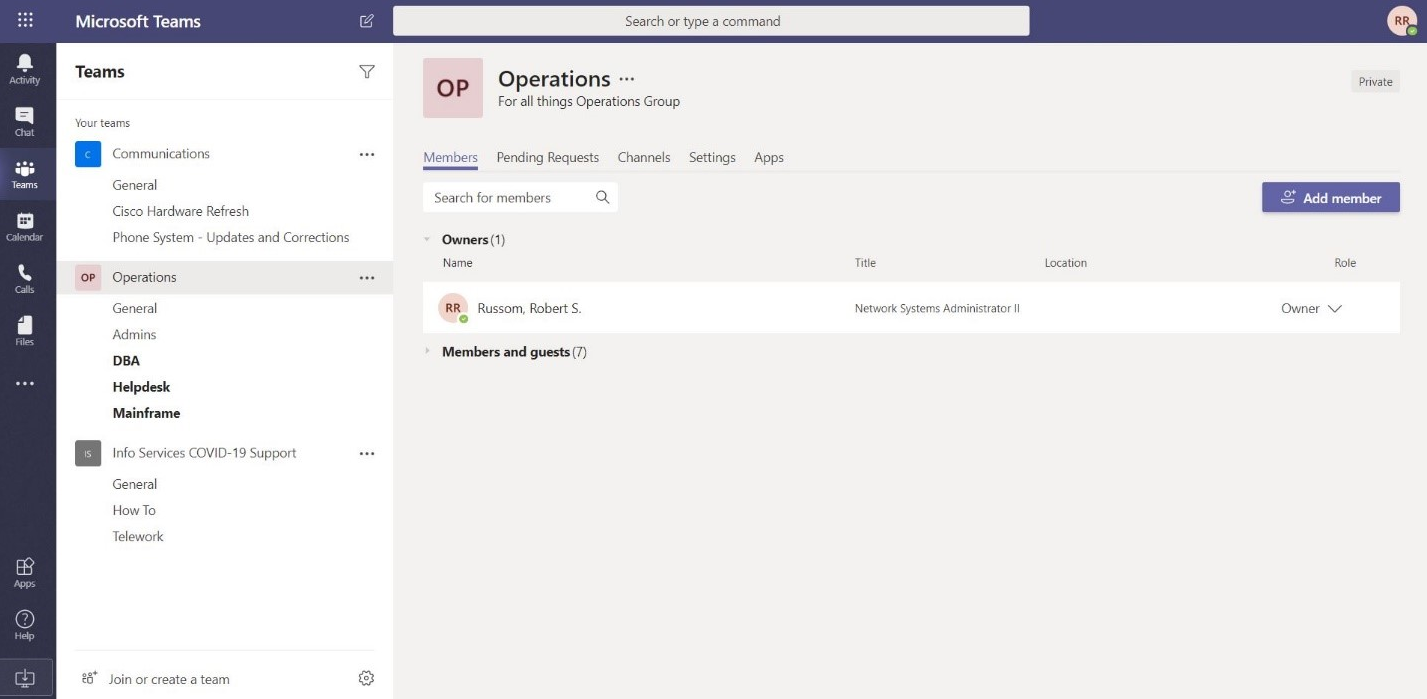
Looking at this example, you see teams that I created for the Communications department and IMS Operations, and one I was added to by another for updates on the COVID-19 virus. Within each team, there are channels for different groups within the team.
After installing Teams on your computer and opening it, you’ll see a window much like the online version.
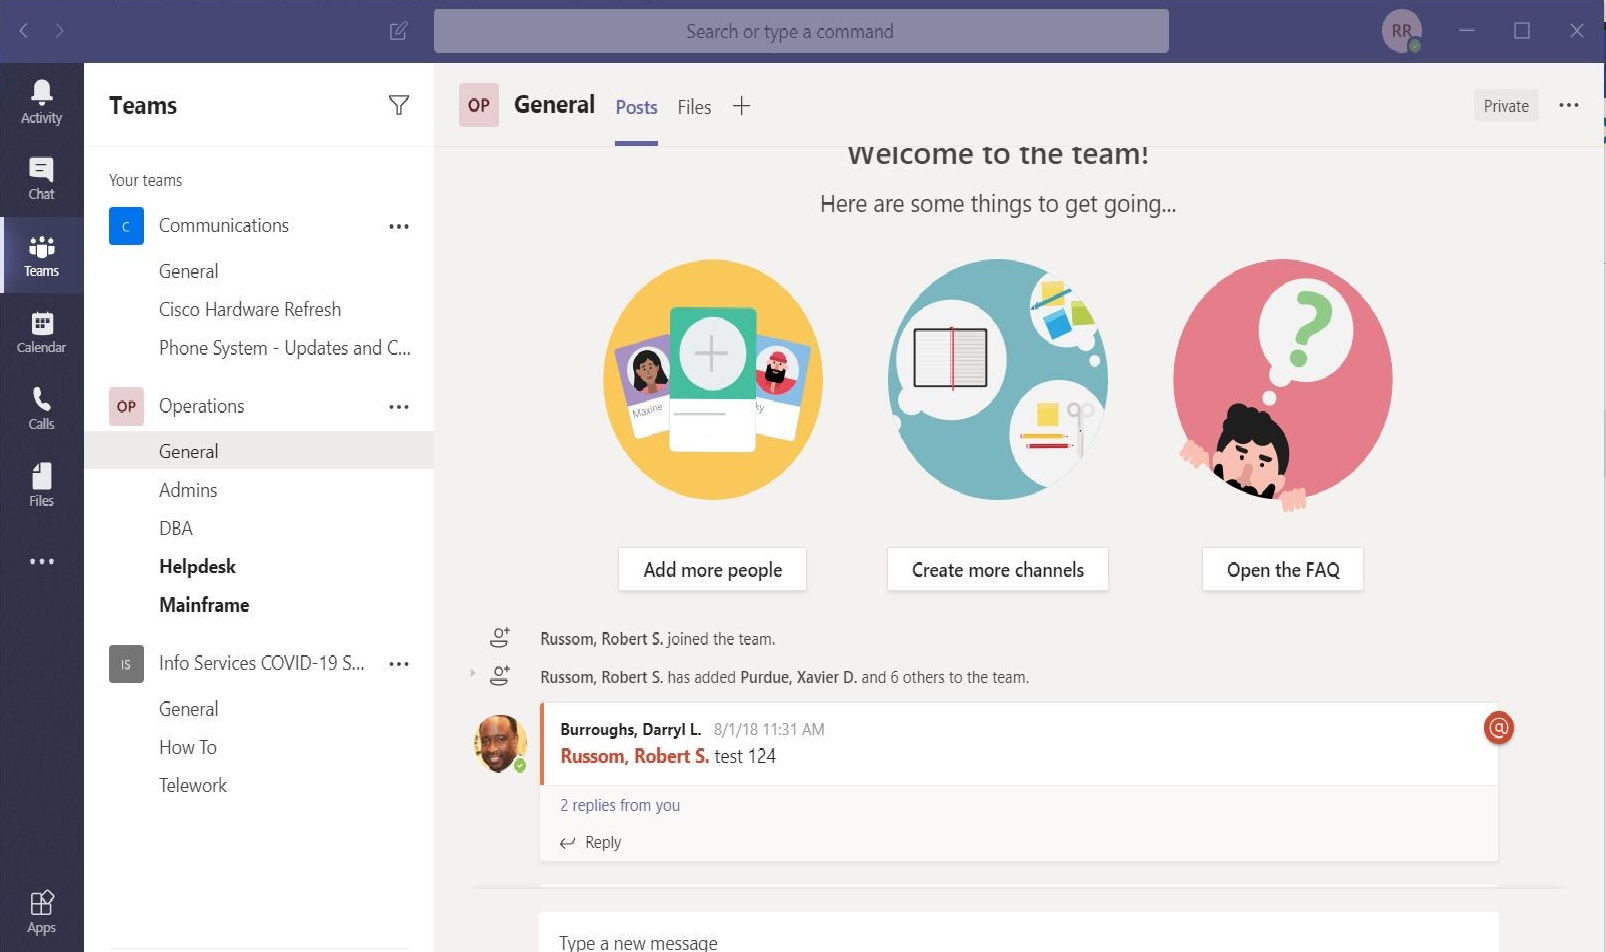
In this example, I’ve clicked on the “General” team and can see any chats, messages, or calls, and add files to only this channel.
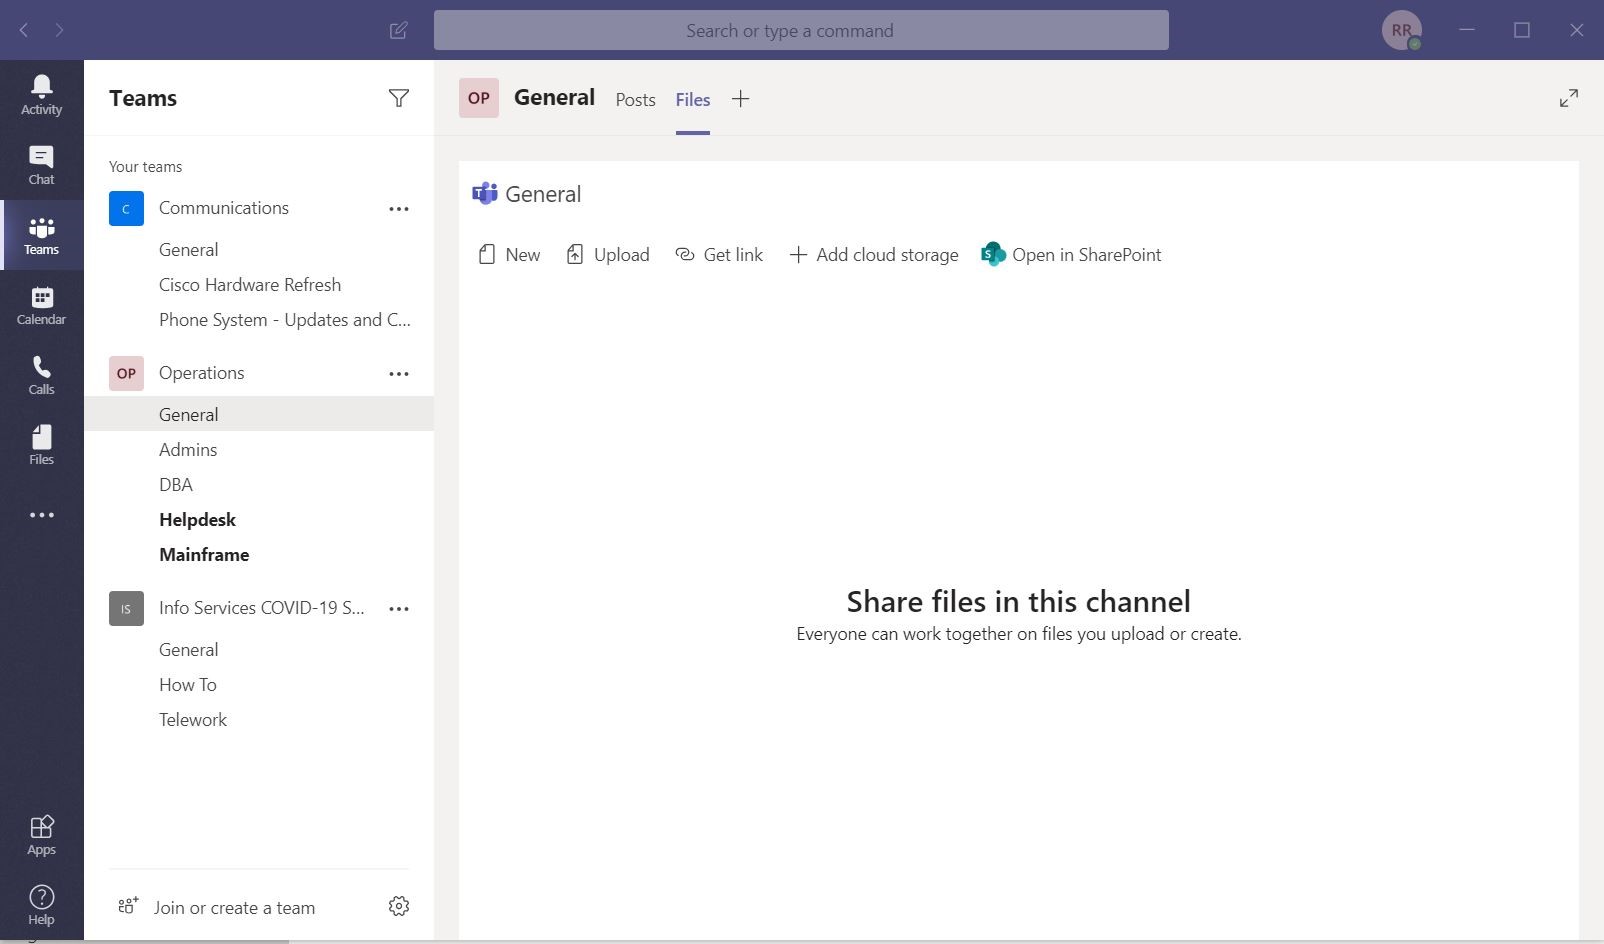
Files can be uploaded from your local computer, or your OneDrive account. For information on setting up OneDrive if you haven't already, see the article: OneDrive Setup
The next steps will be adding users and creating your first team.
To create a new team, click on “Join or Create Team” in the main window.
Click “Build a Team from Scratch”
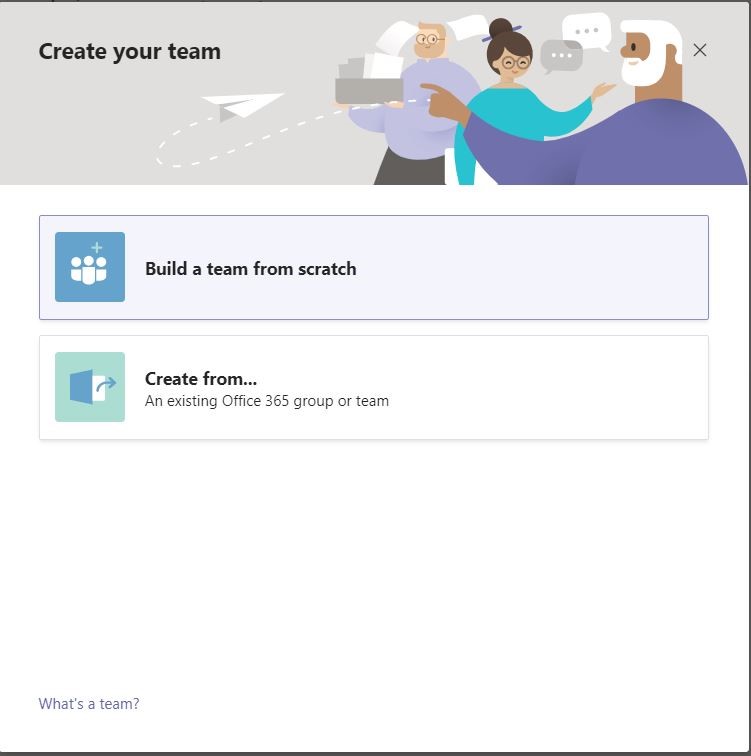
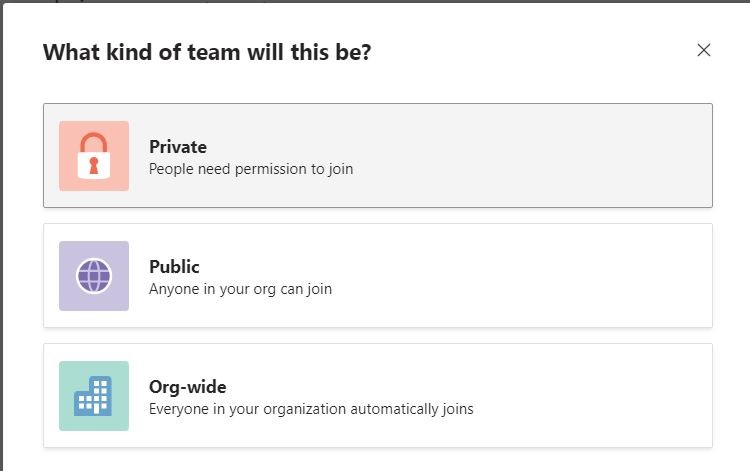
Choose what type of team you want. For inter-department teams, you want to control access, so chose “Private”
The Office of Public Information could create an "Org-Wide" team to share information with all employees running Teams, since everyone is automatically added to an Org-Wide team.
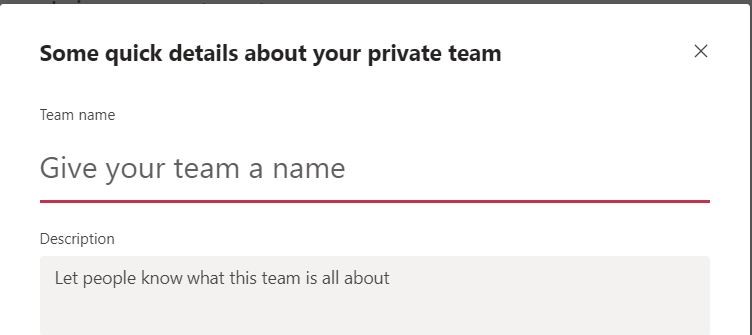
Give your team a descriptive name
And then add members by name or email address
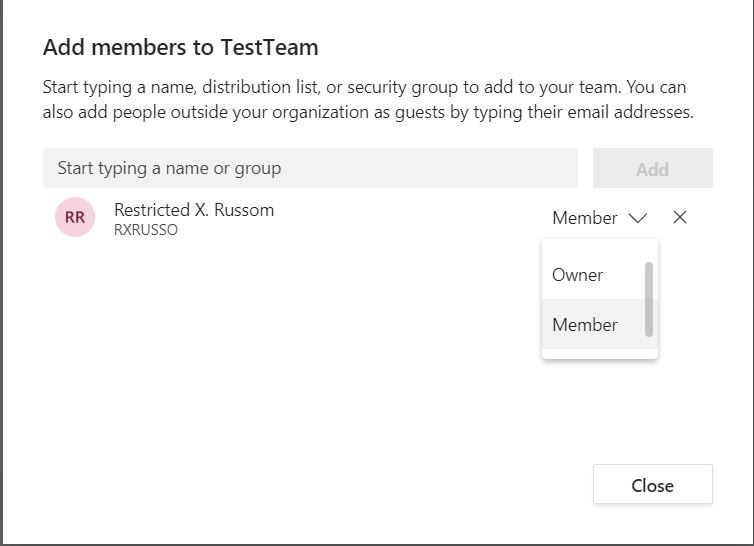
You add users as members or owners. Owners have rights to add members and create new channels. This allows the team owner to delegate team administration to others. These permissions can be later modified or revoked. For example: the owner is changing positions within the city. They can assign another user as owner of the Team and then remove themselves.
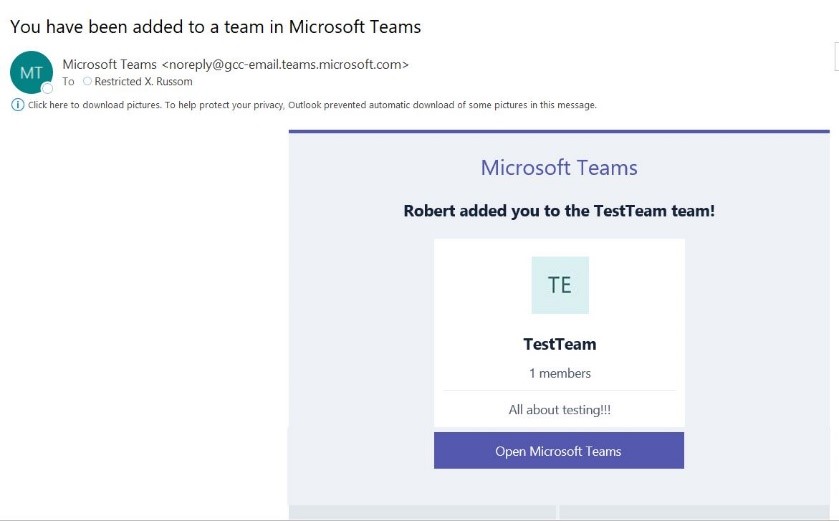
Added users receive an email saying they’ve been added to a team and given the opportunity to open and download Teams of they haven’t already. If the user already has Teams installed, they’ll see the new Team when they log in.
Now that your new team is built and your initial users added, owners can now add channels, if desired, to divide roles and responsibilities and add members.
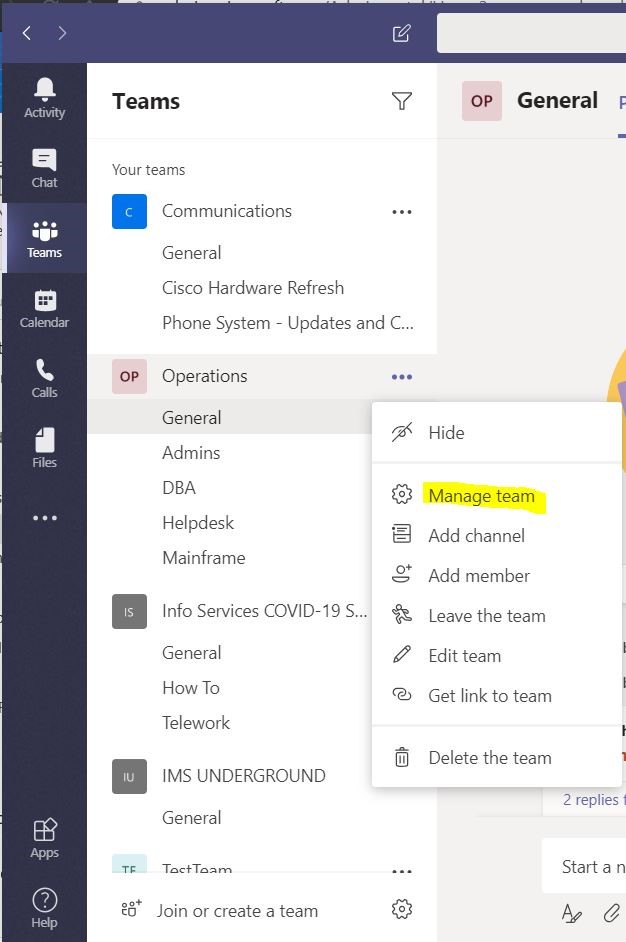
The overall team, or the separate channels, can be modified by clicking on the three dots to the right of the name and selecting “Manage Team”. You can also add channels and members from this menu.
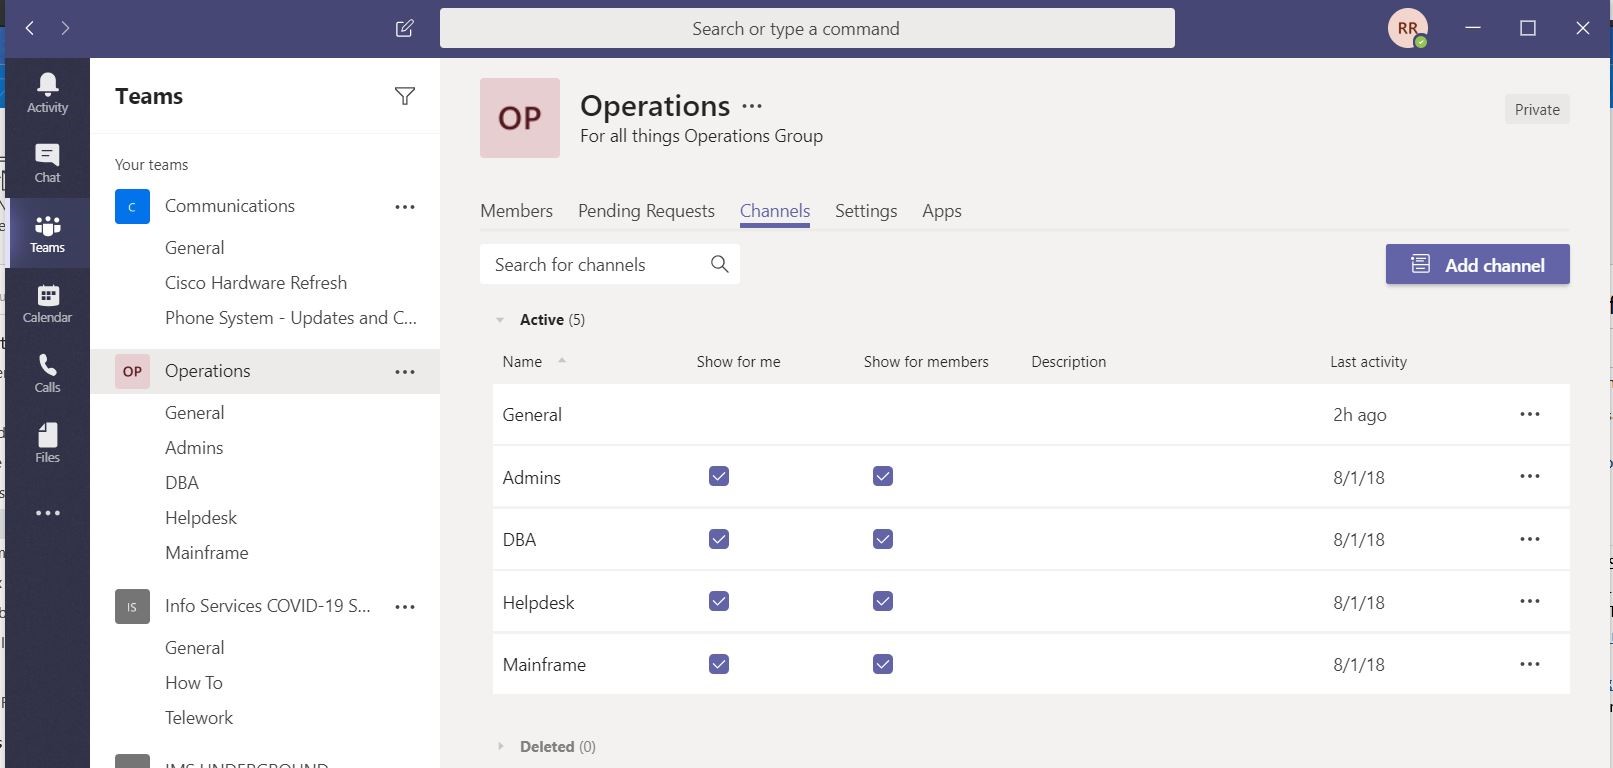
To add a channel to your team, click on your team and select “channels”. You’ll be able to create a new channel underneath the main team and control who has access to it. Owners has access to all channels and all members have access to the General channel.
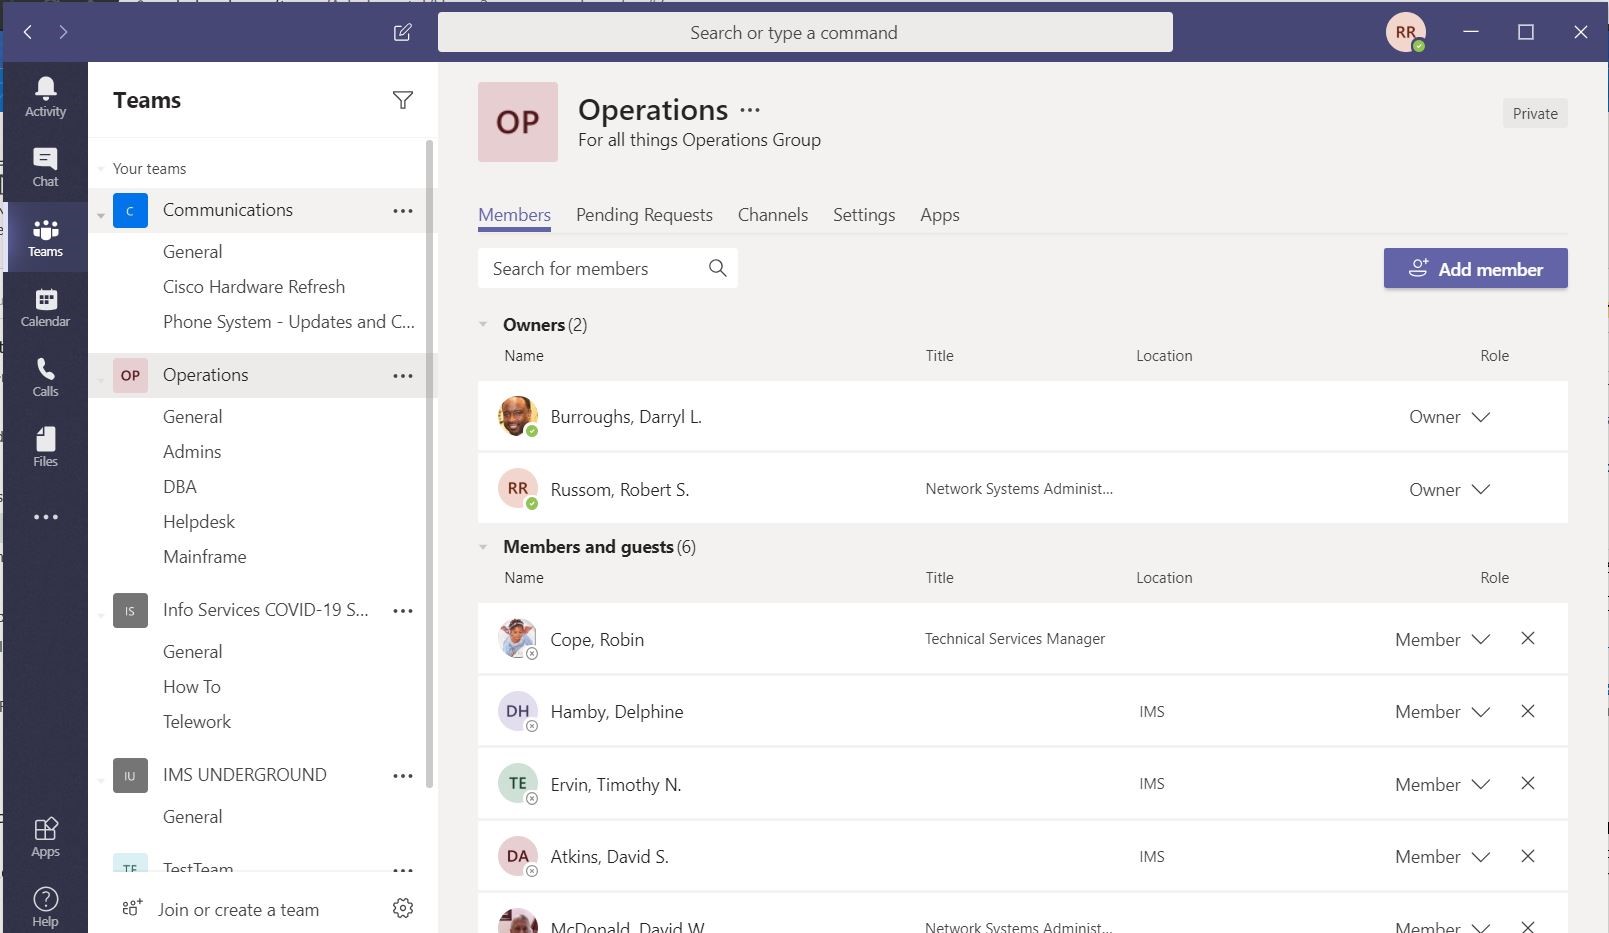
Members can be added, deleted, or modified
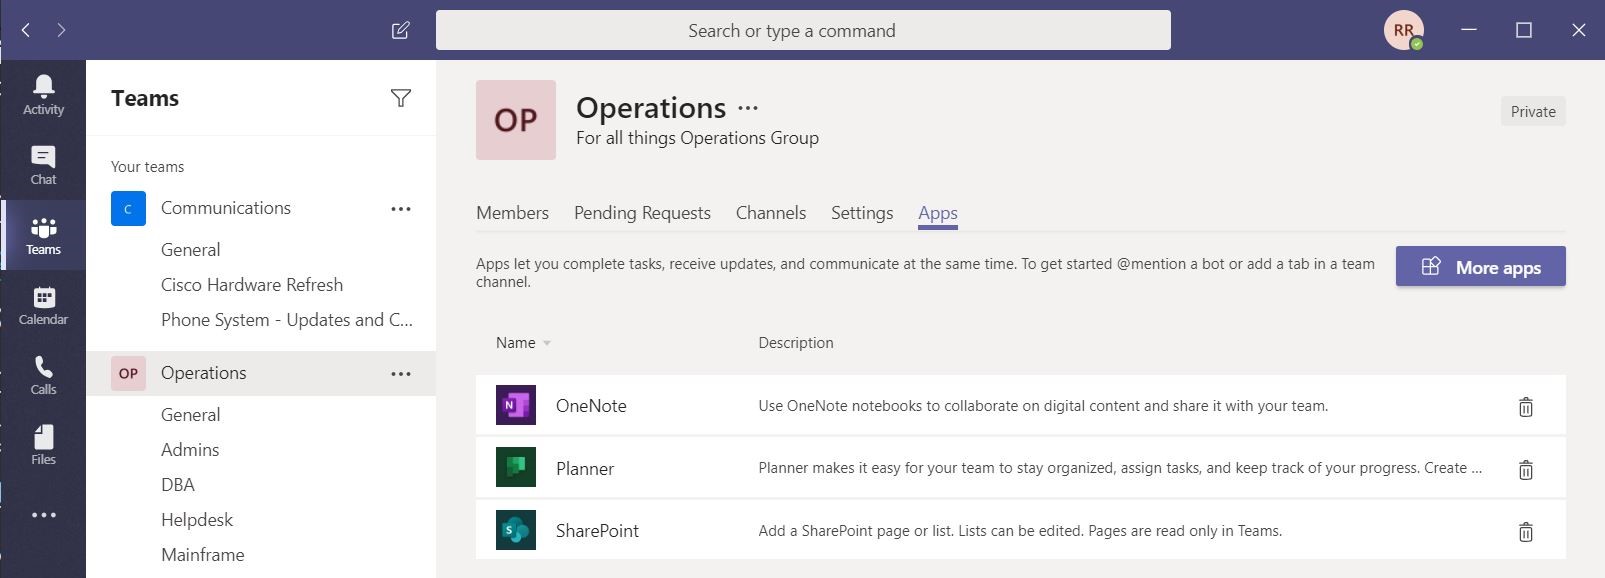
Other Office365 apps can be leveraged within your team channel.
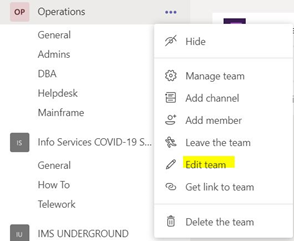
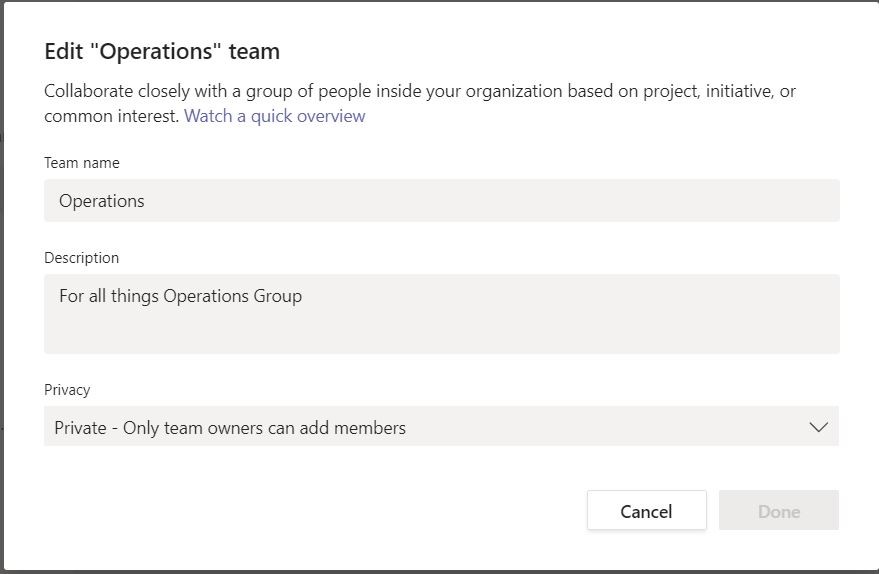
To edit the team name, description, and privacy settings for your team, click on the three dots and select “Edit Team”
Now that you’ve created your team, added members and channels, let’s a look at some of the available features. Once again, this is not a comprehensive list and only scratches the surface of available features. Microsoft, and others, offer training courses and publications to help you get the most out of Teams.
Chat/IM
Users can chat/IM with any member of their team, channel or anyone within the City’s organization. A history of all communication is kept and is searchable for compliance purposes. Files can be shared right within the chat window.
Calendar
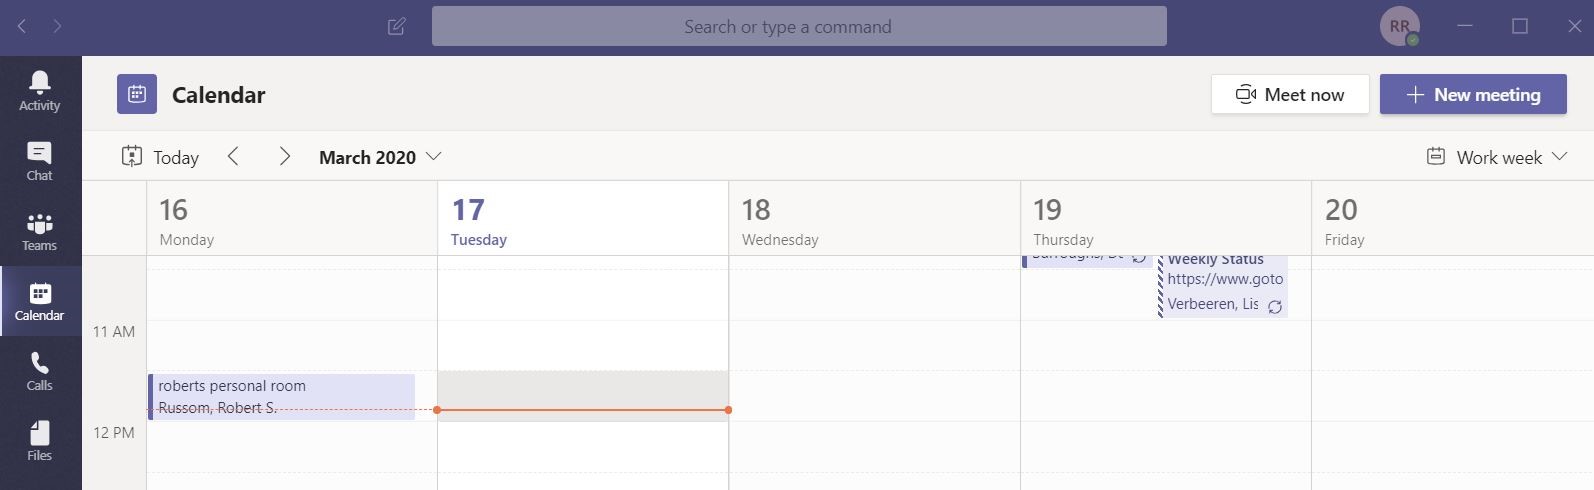
The Teams calendar offers a shared calendar for each team. It will also show you any calendar entries you may have added with your Outlook.
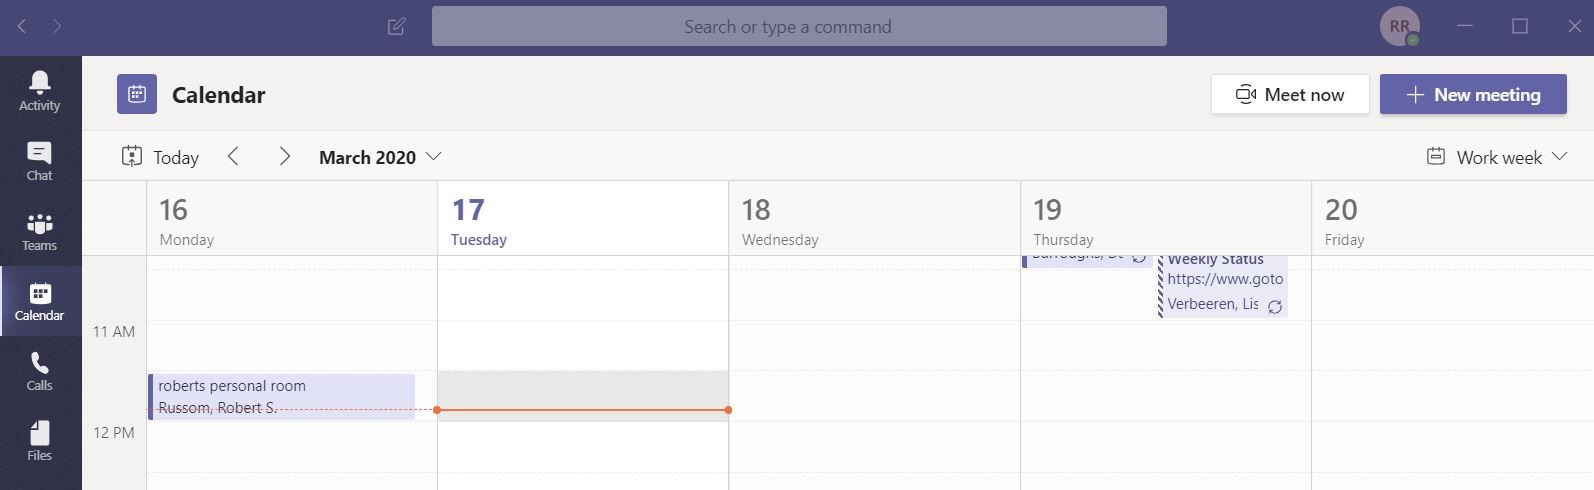
You can schedule meetings from the team calendar. Meetings can be in person or even an audio/ video call. Audio/Video calls are done with your computer’s microphone, speakers, and camera if you have one, or with the Teams app on your smartphone.
To schedule a meeting, click on the “New Meeting” button at the top-right of the calendar window.
Give your meeting a title, select a date and time, and select which channel you’d like to meet with.
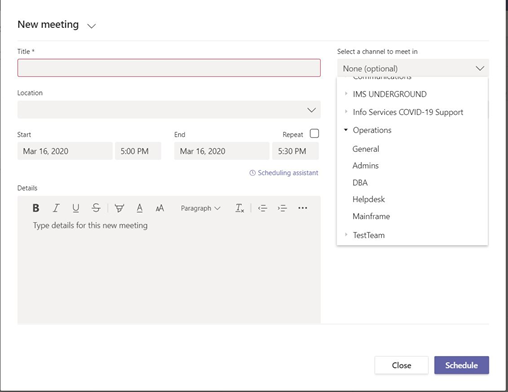
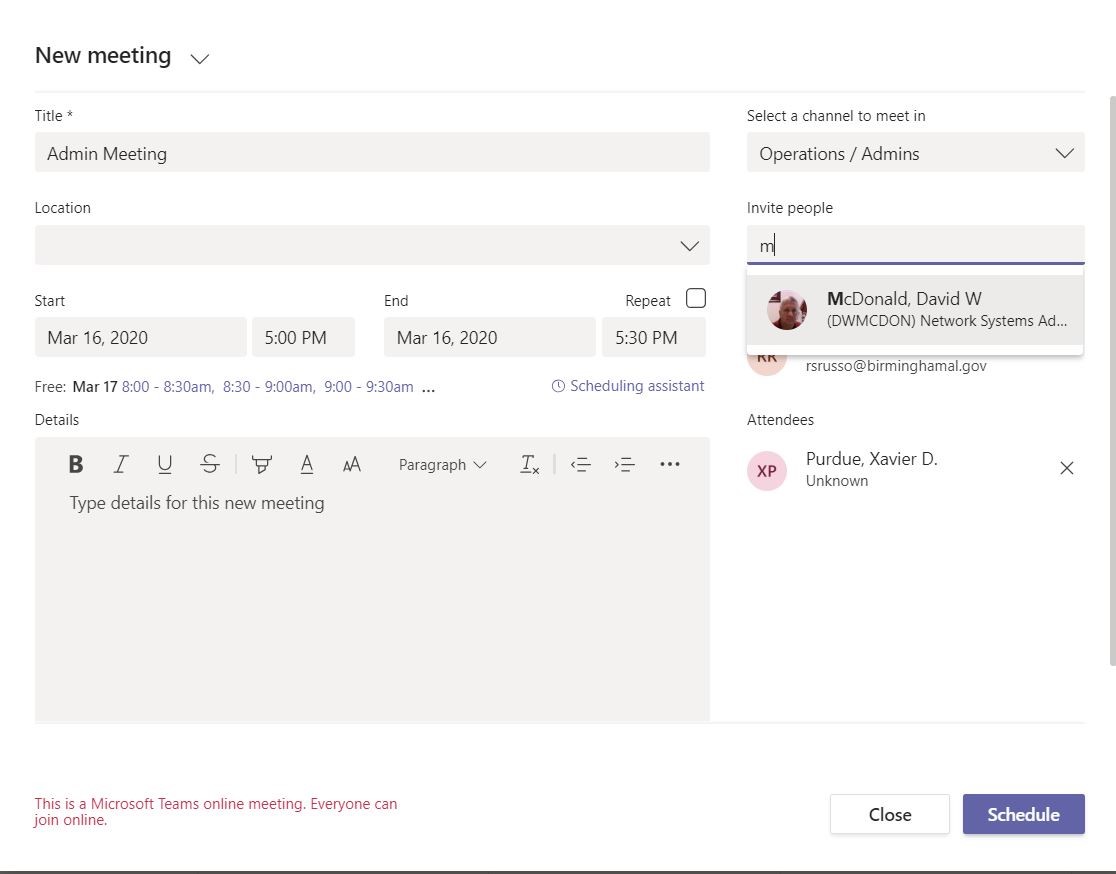
You can then add the users to meet with and click on the “Schedule” button. Added users will receive an invite.
You can also host an “Ad-Hoc” meeting right from the Calendar window by clicking the “Meet Now” button.
You’re able to use any available multimedia equipment you may have installed on your computer. In this case, my PC camera is identified, so I’m able to host a video meeting, if desired.
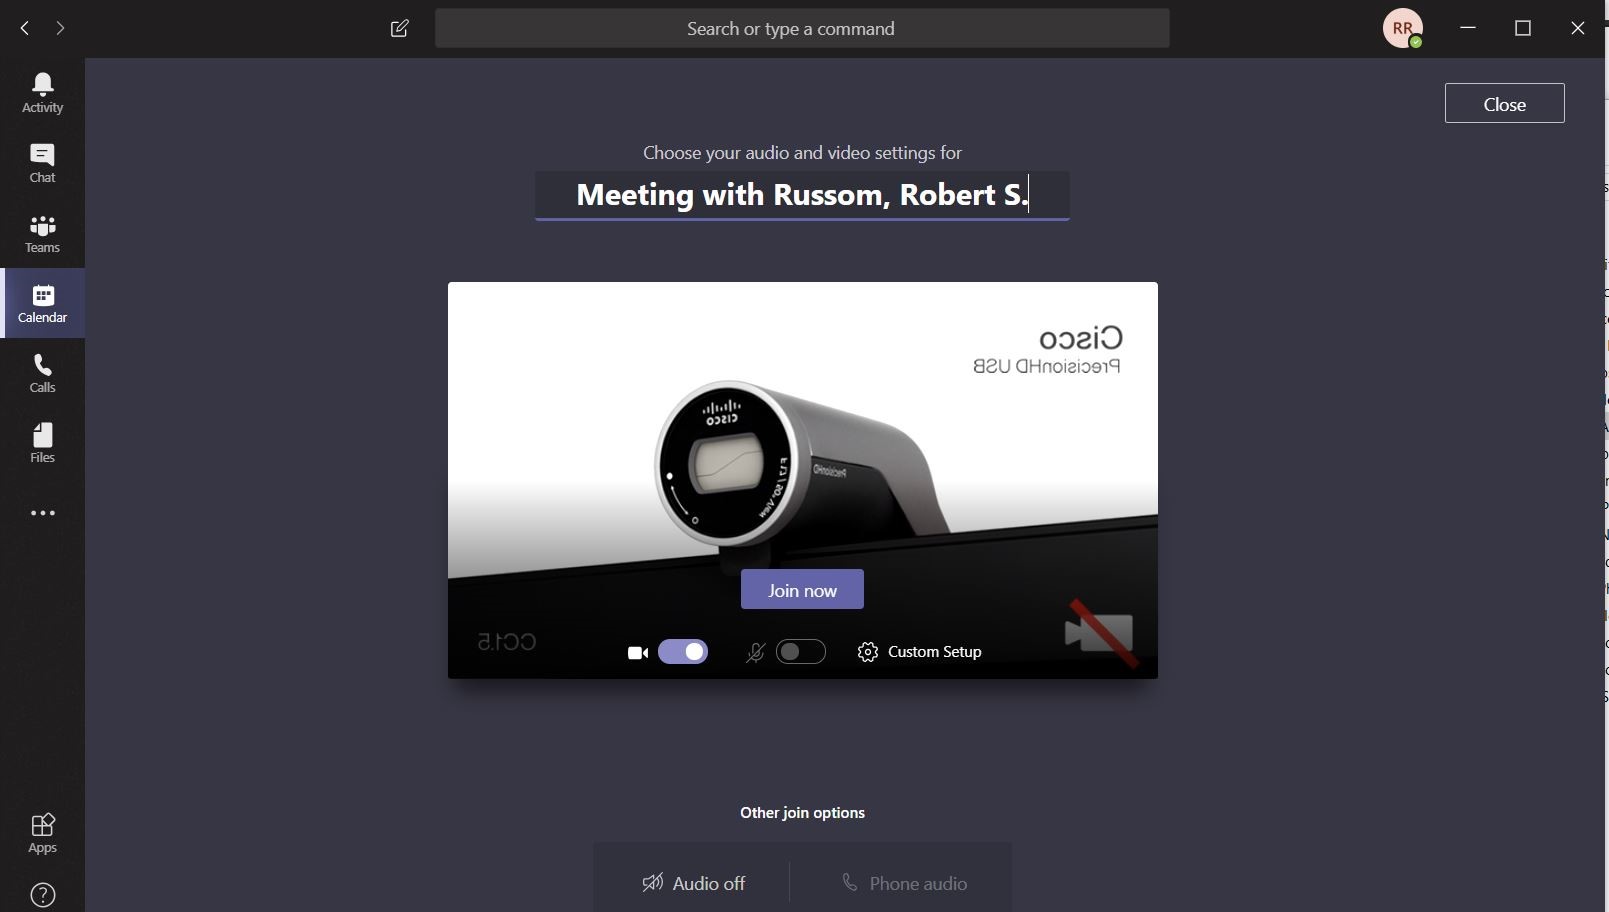
You invite users much the same as when you schedule a meeting 
Calls
You can also make an audio or video call to other Teams users from the Teams app by clicking the “Call” button on the left. Audio/Video calls use your computer’s sound-card and microphone and video camera, if equipped. The Teams app on a smartphone can also be used.
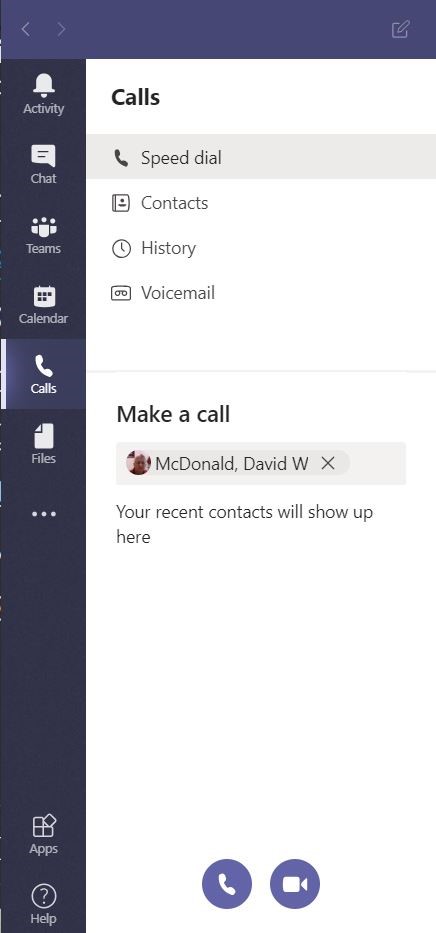
Files
You’re able to upload files for your teams or channels, from a local computer, a file share when on the city’s network, or from OneDrive. Uploaded files can be made available to the entire team or individual channels. Note: you are not allowed to add 3rd party could storage providers such as Dropbox or Google Drive.
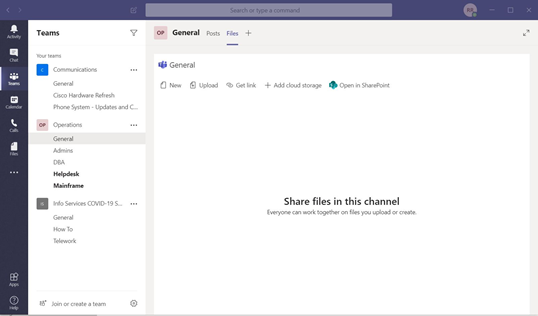
User status
You can select the status shown to other team members by clicking on your initials in the top right of the app. Your status will automatically change to “busy” when in a meeting, scheduled or otherwise.
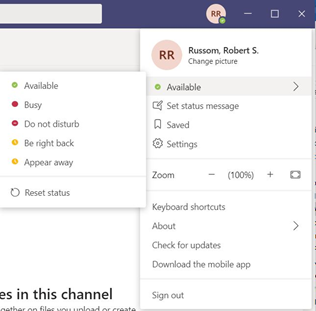
Thanks for taking the time to read this document. Hopefully, you’ll soon be on your way to better communication and collaboration with your co-workers.
Comments
0 comments
Article is closed for comments.